Usually I say that I started quilting some time in 2011, but that’s not entirely accurate. When I was at John Edwards High School in my hometown of Port Edwards, Wisconsin, I loved art class. Our beloved art teacher, Mrs. Bushmaker, an artist herself, really encouraged and nurtured her students as artists. We were a lucky bunch of students in having access to a teacher who indulged us in silkscreening, linocut printmaking, jewelry making (as in casting silver into rings and using blow torches), painting with watercolor, acrylic, and oil, throwing clay on pottery wheels and on and on. So when I approached Mrs. Bushmaker and asked her if I could do quilted wall art piece as an independent art project, it was really no surprise when she said, “yes!”
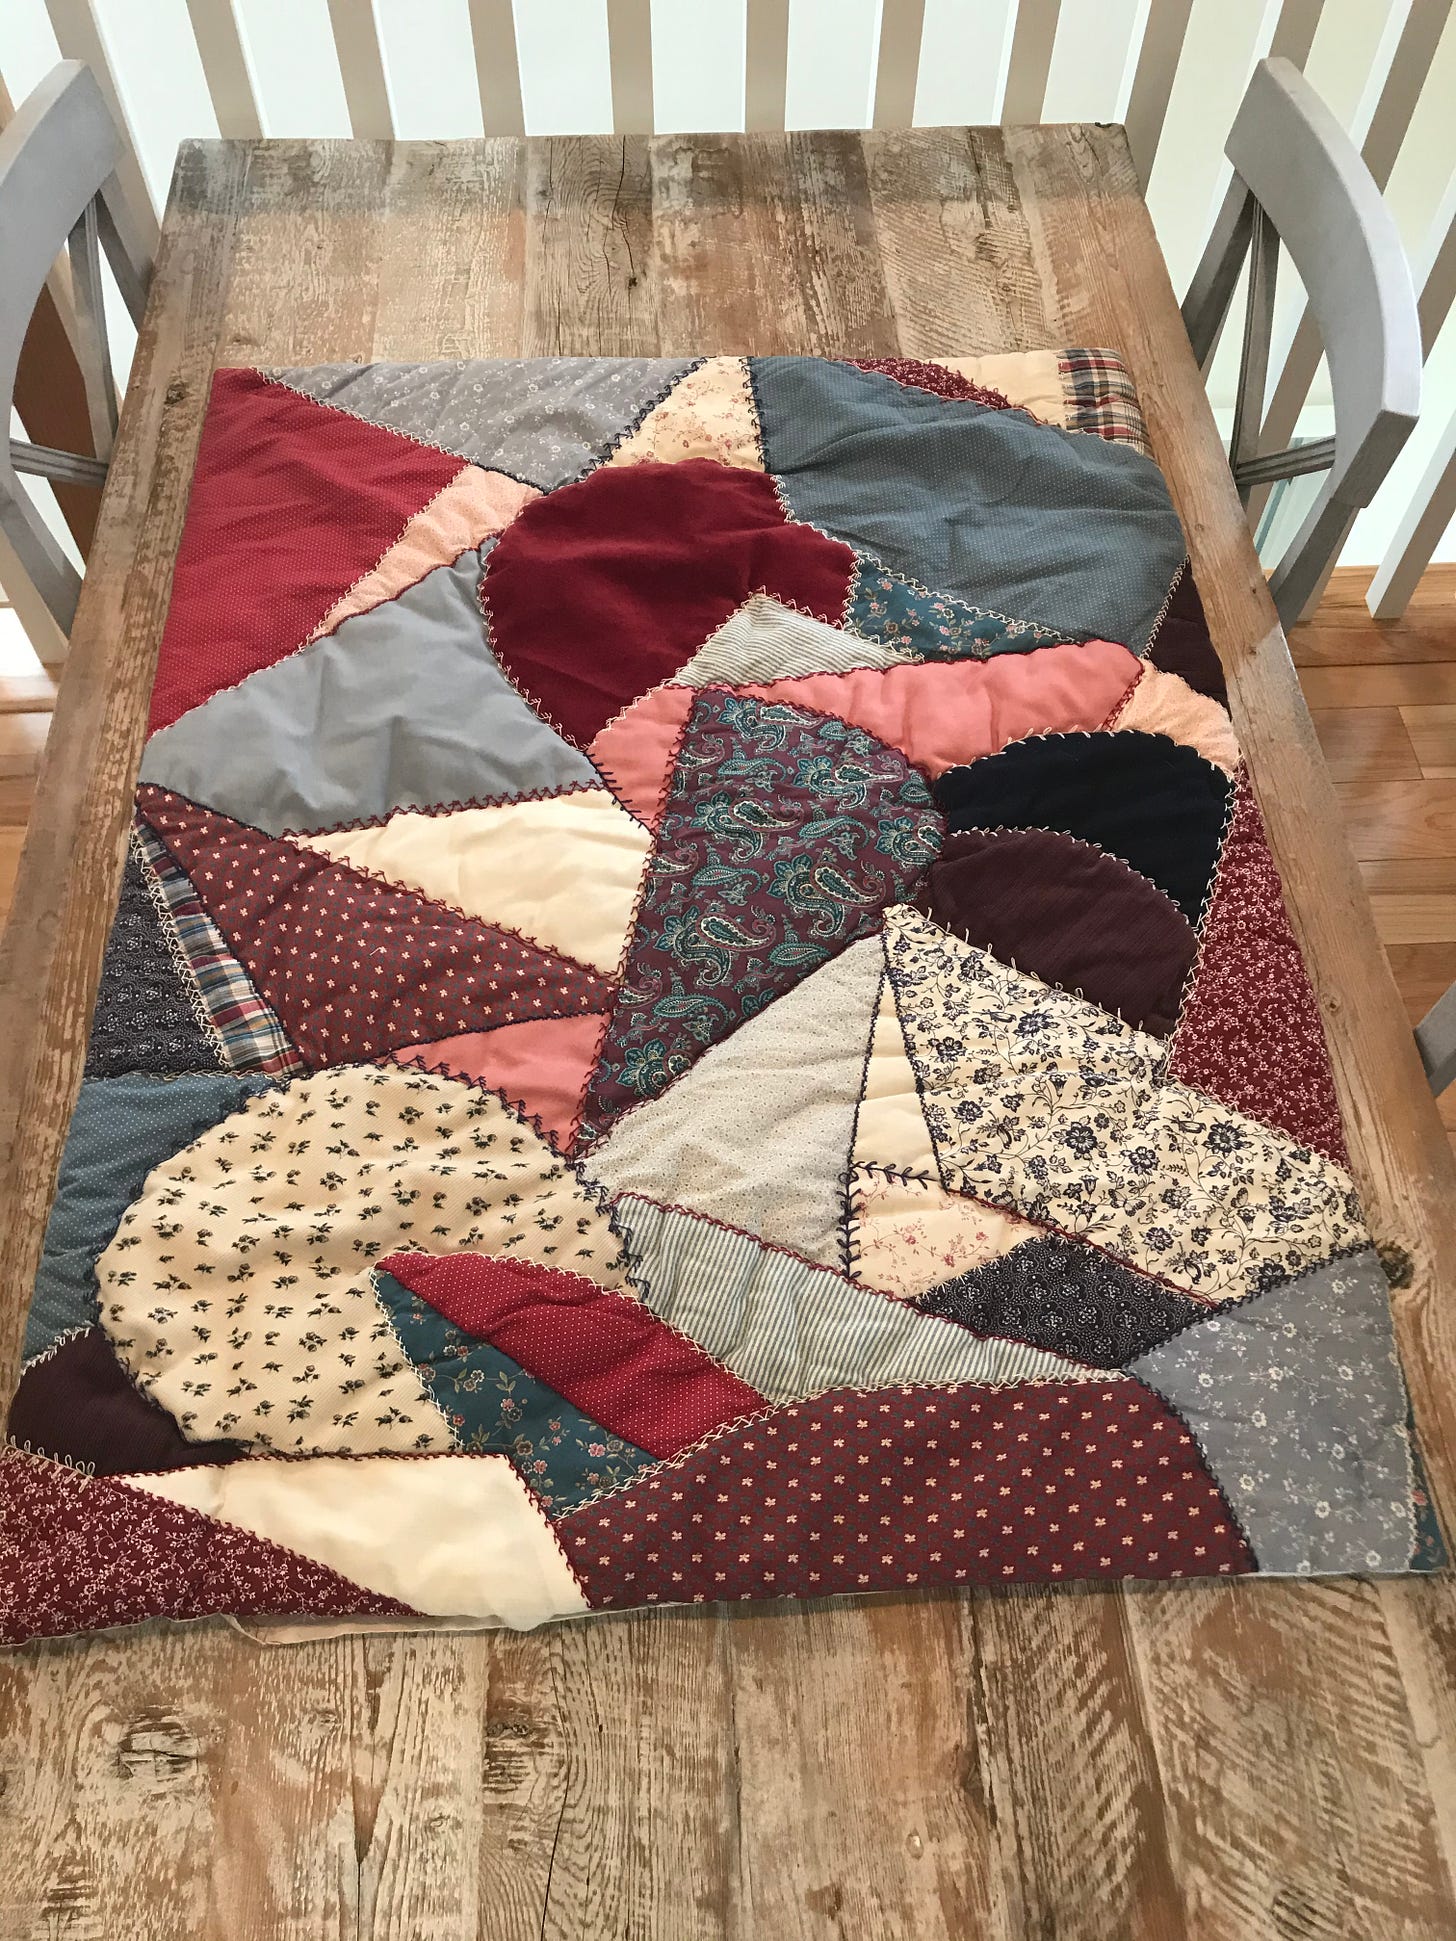
I don’t remember a lot about how I worked my way through the project, much is a guess at this point. Most simply and logically, I must have drawn out the design on paper, used it as a template for laying out and cutting various fabrics and then stitched the pieces together. When I look closely at the shapes, angles and curves, it seems that there was no rhyme or reason.
Clearly I didn’t account for how seams would come together; I have points and corners tucked into curves and circles - it appears that I just “went for it.” I didn’t know any differently, so I marched forward most likely thinking that I’d just figure it out and make it work.
I do have a memory of visiting the local sewing store, like a Joann Fabrics where I (with Mom’s help and wallet) purchased several small pieces of fabric. I knew nothing about quilting cotton at the time, so I chose what I liked in both color and texture - blues, maroons, whites, corduroy, cotton, velvet, and flannel.
It’s entirely possible that Mrs. Bushmaker had a sewing machine in her classroom, so I may have stitched pieces of fabric during class. I also know that I spent time in Busia’s basement (my maternal grandmother’s who’s in the picture with me on my homepage) on her Singer sewing machine and on my mom’s exact same model Singer at our house with guidance from Busia and Mom along the way.
Eventually I finished piecing the top of the quilt. I wish I had taken pictures of the back of the quilt top - it’s impressive in a WOW-you’ve-got-a-lot-of-seams-going-every-which-way kind of way. But, it was stitched together, and it really didn’t matter in the end because no one would ever see that side.
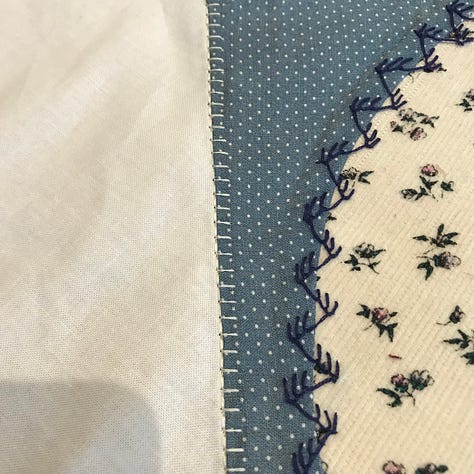
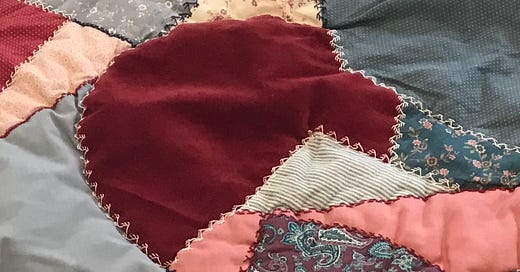
I spent a lot of time with Busia for the next part because I embellished the top of the quilt with hand-stitched embroidery along all of the seams. I don’t know how, when or where Busia learned these stitches (probably from her mother who was a sewing teacher in the late 1800’s/early 1900’s).
After talking with my mom, we both agreed that Busia must have committed these embroidery stitches to memory. Neither of us remember her every consulting notes or a book to refresh her memory on how to do these stitches; she just started stitching, producing perfectly shaped and spaced fancy stitches. So so-side-by-side, she’d show me how to prep a needle with thread (how much length, how to knot), where to place the needle, how much tension to pull on the thread (not too tight/not too loose). At first my stitches were clunky and wonky, but using hers as a model, I worked to make mine look as close to Busia’s as I could.
After the decorative stitching was completed, I hand-basted a polyester batting (closest to the quilt top) and a layer of cheesecloth to the back of the quilt top.
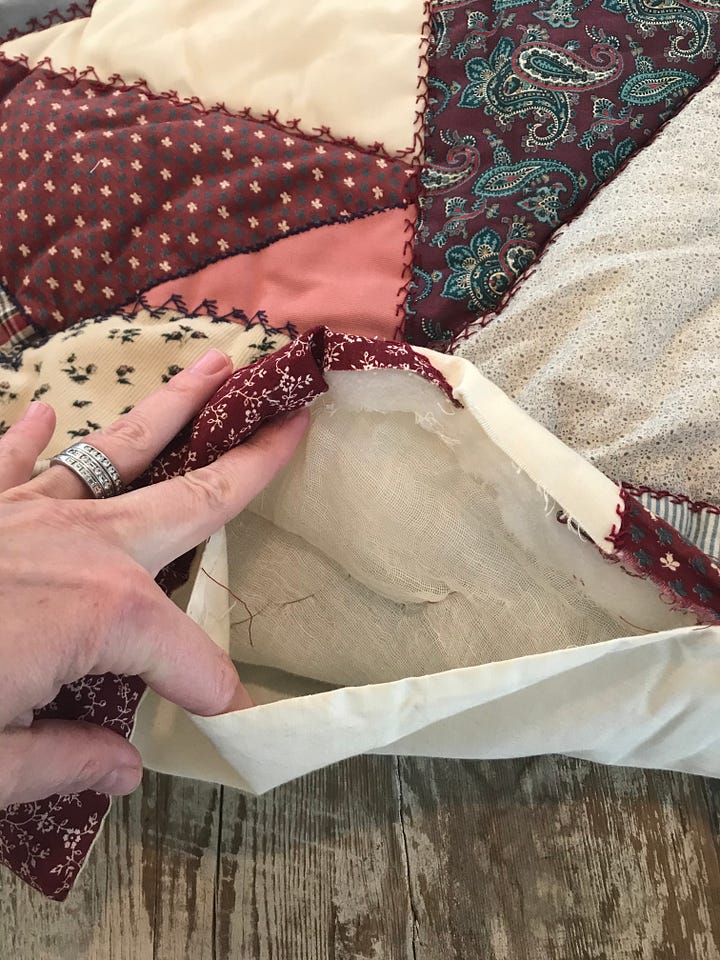
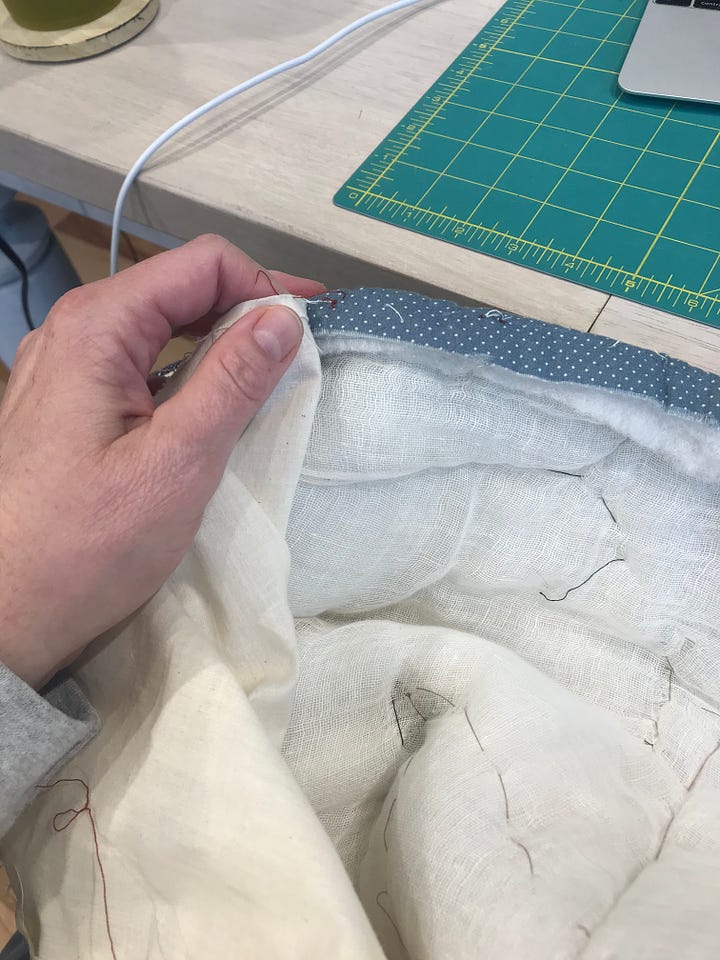
I used muslin as my quilt backing fabric, and machine-stitched that to the top fabrics (like a pillow case - no binding). And finally, Mom showed me how to make and sew a quilt sleeve to the back of the piece so it could be hung on a wall.

This quilt, in its original form, had been with me since 1983. It’s lived with me in apartments and homes in Milwaukee, Minneapolis, The Netherlands and Houston. But almost 40 years after I made it, and by 2020 being a much more confident quilter, I decided to modernize the quilt. So with the same “just figure it out and make it work” energy I had when I was 17 years old, I started taking apart the quilt to see what I could do with it.
The quilt was easy to disassemble given how it was put together. Because the backing wasn’t quilted to the top and batting layers, a seam ripper was all I needed to remove the stitches along the four edges. And my hand-basting stitches connecting the batting/cheesecloth to the quilt top were so big, they came out in minutes. Once the quilt top was separated from the quilt sandwich, I hand-washed it and then it was ready to be re-imagined into a new wall hanging.
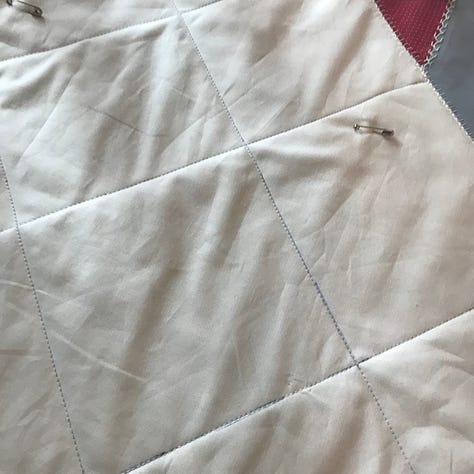
I decided my original quilt would become the center of the new piece. Quite simply (see pictures below), I cut the original rectangular quilt top into a square and machine-appliqued (using a blanket stitch) that square onto a piece of cream-colored quilting cotton (also a square). Next I made a quilt sandwich with the quilt top, cotton batting and the same cream-colored quilting cotton as the backing. I heavily quilted the cream section of the sandwich using my machine’s walking foot to make roughly 1/2” squares and stitched in the ditch on the original quilt piece to secure. To finish I added a binding to the edges and quilt sleeve to the back.
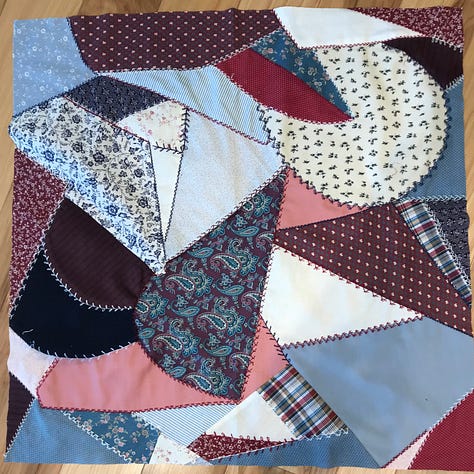

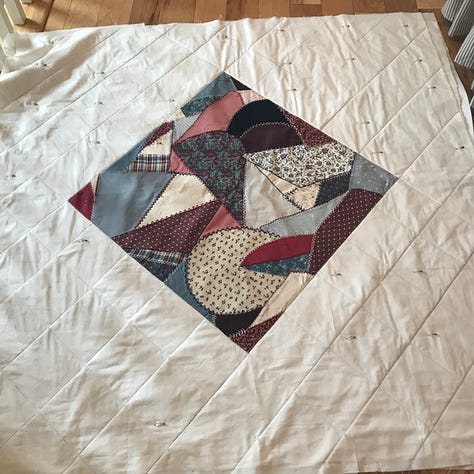

Et voila! The end result - it’s fresh yet honors the skills of generations before me.





I love this, wow! So neat when we find evidence that our ancestors really are alive in us, not just in how we look or our dna, but in the very real and persistent notions of our heart, our personality, our talents. Such a gift you’ve got--and inherited! 😍